Frame synchronization enables you to configure the content of one frame to trigger playback of content in another frame on the same screen (or display unit). This feature is also known as "triggering".
Example: Imagine that you have one player with two frames on a screen: a main frame and a sidebar. Further, when an ad for local municipal transport appears on the main frame, you want bus schedule information to appear on the sidebar. You can configure your display such that when the ad appears, it triggers playback of the schedule information.
Example: Imagine that you have a player with multiple video outlets. On each outlet, you want to play identical content: a movie trailer, in sync. You can configure each outlet to correspond to separate frames of a display unit. The contents of each frame can play at the same time, which will appear synchronized.
First, we need to clarify the difference between regular content, and triggering and triggered content:
- Regular content – Refers to campaigns targeting your display unit’s frames. They will play when and where specified. These campaigns are not required for frame synchronization.
- Triggering content – Refers to the campaign that sends the trigger. We refer to the frame playing this campaign as the Master frame.
- Triggered content – Refers to the frame that receives the trigger. The content/campaign is the response. We refer to the frame playing this campaign as the Slave frame.
Note: All Players in a Synchronization Set must be on the same major version to prevent synchronization issues. For example, they must all be v13.2 Players or v14.0 Players.
Prerequisites
Frame synchronization is an advanced feature. Before configuring it, ensure that you are familiar with the following:
Workflow
In general, the workflow to execute frame synchronization is:
- Create two loop policies (Master and Slave)
- Assign the loop policies to their respective frames
- Create a trigger category
- Book two campaigns (Master and Slave)
Notes
As you set up frame synchronization, keep in mind the following:
- The Slave campaign plays as the response to the trigger on the Slave frame.
- When activated, the triggered campaign interrupts the loop on the Slave frame, and plays.
- When the Slave campaign finishes playing, the player returns to the interrupted loop and replays the disrupted slot.
Frame synchronization requires two loop policies: one for the Master frame and one for the Slave frame.
The difference between each loop policy is the "synchronization" type.
To create the Master and Slave loop policies:
-
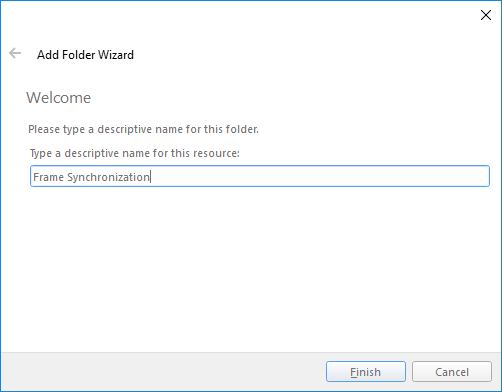
To keep things organized, for this tutorial we recommend you create a loop policy folder called "Frame Synchronization".

- In the Frame Synchronization folder, add a loop policy called "Master".
- Set the Policy Settings to whatever you want. They are unimportant for this tutorial.
- Open the Loop Policy Properties. Go to Settings > Synchronization.
-
Set the Synchronization Type to "Master".

- In the Frame Synchronization folder, add another loop policy called "Slave".
- In the Loop Policy Properties, set the Synchronization Type to "Slave".

For our example, we will need a display unit with two frames. One will become the Master frame; the other will become the Slave frame.
To assign the loop policies to the frames:
- Create a display unit.
- On the Loop Policy page, be sure to avoid selecting either the Master or Slave policy.
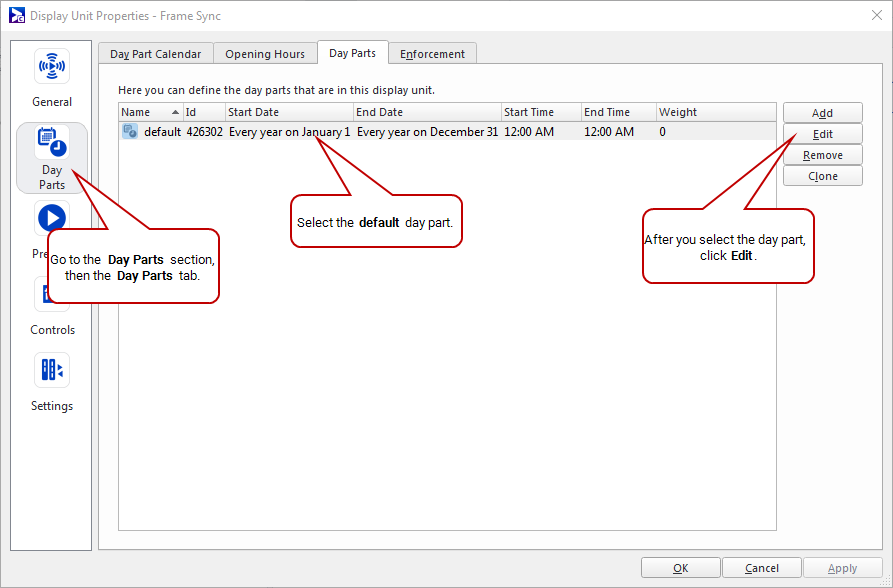
- Open the Display Unit Properties. Go to Day Parts > Day Parts.
-
Select the default day part, and then select Edit.

- The Day Part Properties dialogue box opens. Go to the Frames tab.
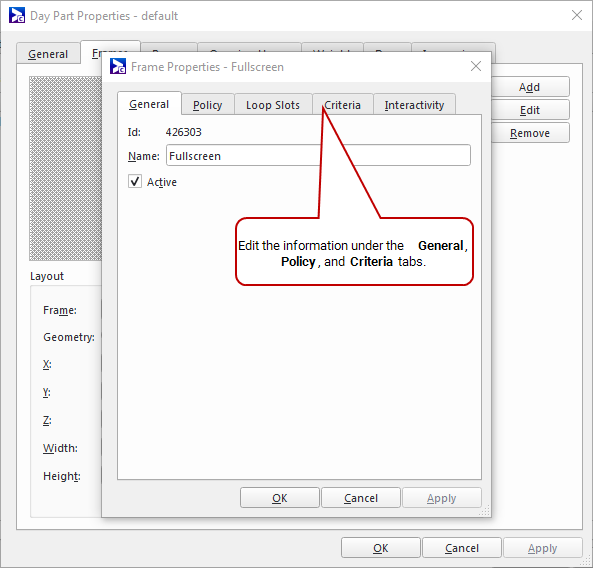
- Select the default "Fullscreen" frame, and click Edit. This frame will become our Master.
- General tab – Change the name from "Fullscreen" to "Main Frame (Master)".
- Policy tab – Select the "Master" policy we created in Step 1: Create Two Loop Policies (Master and Slave).
-
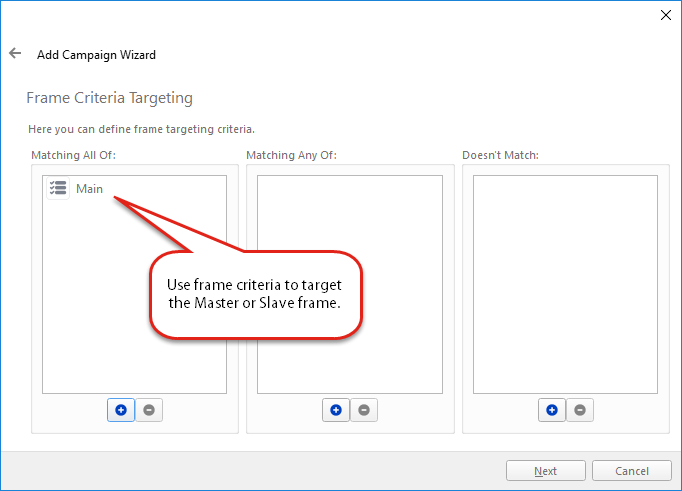
Criteria tab – From the Frame folder, select the "Main" criterion. (We created this in the Criteria video. You may have your own naming system.)

- Click Apply.
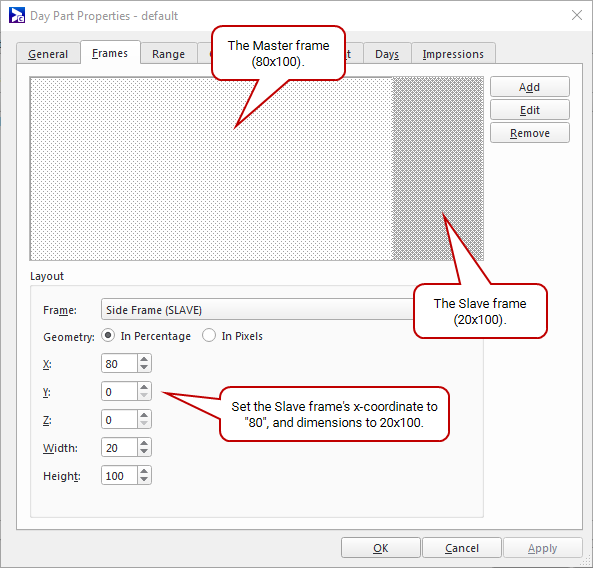
- Under Layout, set the following:
- Geometry – "In Percentage"
- Width – "80"
- Height – "100"
- Click Apply.
- To add a Slave frame, click Add. Pay special attention to the following pages:
- Welcome – Enter the name "Side Frame (Slave)".
- Dimensions – Deselect Frame is full screen, set the X co-ordinate to "80", the width to "20", and leave the height at "100".
- Loop Policy – Select the "Slave" policy we created in Step 1: Create Two Loop Policies (Master and Slave).
- Criteria Selection – Expand the Frame folder, and select the "Side" criterion. (We created this in the Criteria video. You may have your own naming system.)
Note: If you created a new display unit for this tutorial, be sure to assign it to a player. Open the Display Unit Properties, go to General > Players, and click Add.
This step describes how to book one or more campaigns for Frame Sync.
The easiest way to execute Frame Sync is to use a single campaign that plays on both frames. See Option A: Book a Single Campaign.
If you need to play two different campaigns on the Master and Slave frames, see Option B: Book Master and Slave Campaigns.
The two main parts of this step are:
- Add the "Synchronization " (aka "Bundle Trigger Category ") page to the Add Campaign Wizard.
- Book a single campaign or multiple campaigns.
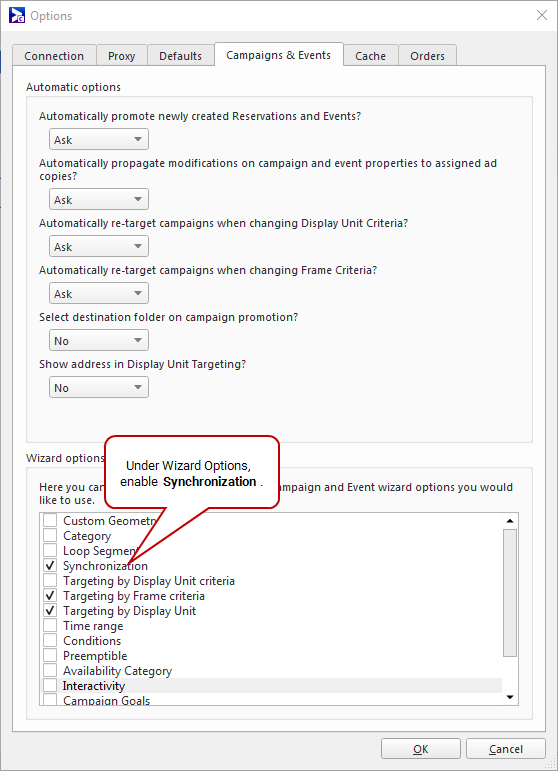
- From the Options menu, select Change Options (see Access the Broadsign Control Administrator Options Menu).
- Go to Campaigns and Events > Wizard Options.
- Select Synchronization.
This option will appear in the Add Campaign Wizard as "Bundle Trigger Category".
For an existing campaign, open its properties, and then go to Media > Trigger (see The Media Section).
- Add a campaign. Pay special attention to the following pages in the Add Campaign Wizard:
- Welcome – Name the campaign "Frame Sync".
-
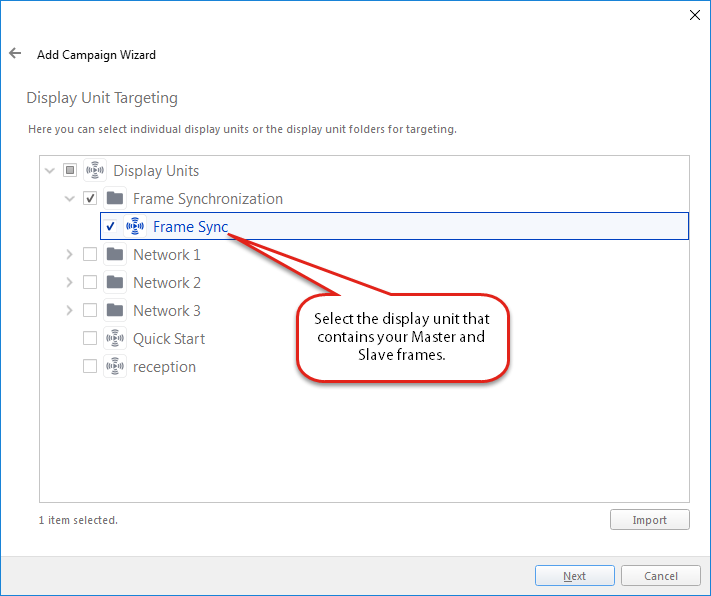
Display Unit Targeting – Select the display unit that contains the Master and Slave frames (see Step 2: Assign the Loop Policies to the Frames).

- Ad Copy Selection – Select the ad copy to assign to the campaign. Ad copy duration is unimportant for player synchronization.
- Bundle Trigger Category – Select Campaign is auto-synchronized. Also, for our example, we will select Same trigger for all bundles.

Note: The Auto-synchronize bundles option can be found in the campaign's Trigger tab under the Media section (The Trigger Tab), as well as the bundle's Trigger tab under the Categories section (The Categories Section).
Finished! You have now set up a basic Frame Sync network.
For our example, we will need one Master campaign. You can synchronize as many Slave campaigns as you want. To synchronize the campaigns, we will refer to the triggering content as the Master Campaign and the triggered content as the Slave Campaign. You must ensure that you assign the same trigger category to both campaigns.
Note: The process for creating each campaign is the same. The only differences are the names, the display units, and the ad copies.
The two main parts of this step are:
- Add a trigger to use in the Master and Slave campaigns.
- Book Master and Slave campaigns.
You need to observe the following:
- Ensure that you schedule the Master campaign to the Master frame.
- Ensure that you schedule the Slave campaign to the Slave frame.
- Ensure that you assign the same trigger category to both campaigns.
To add a Trigger:
- To keep things organized, for this tutorial we recommend you create a trigger folder called "Triggers - Frame Sync".
- In the Triggers - Frame Sync folder, create the trigger. Be sure to enter the following information:
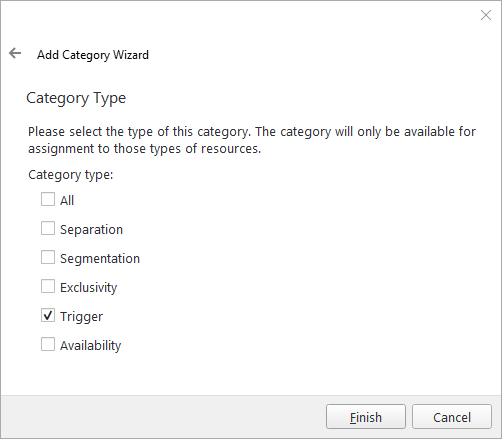
- Welcome – Enter the name "Frame Sync".
- Category Type – Select Trigger, and deselect All.
- Click Finish.
To book Master and Slave Campaigns:
- Book a campaign. Pay special attention to the following pages in the Add Campaign Wizard:
- Display Unit Targeting – Select the display unit that contains the Master and Slave frames (see Step 2: Assign the Loop Policies to the Frames).
- Frame Criteria Targeting – Select the criteria: "Main" for the Main (Master) frame, and "Side" for the Side (Slave) frame.
- Ad Copy Selection – Ensure that the duration of the Master ad copy is longer than, or equal to, the duration of the Slave ad copy.
- Bundle Trigger Category
- For each campaign, whether Master or Slave, ensure that Campaign is auto-synchronized is not selected.
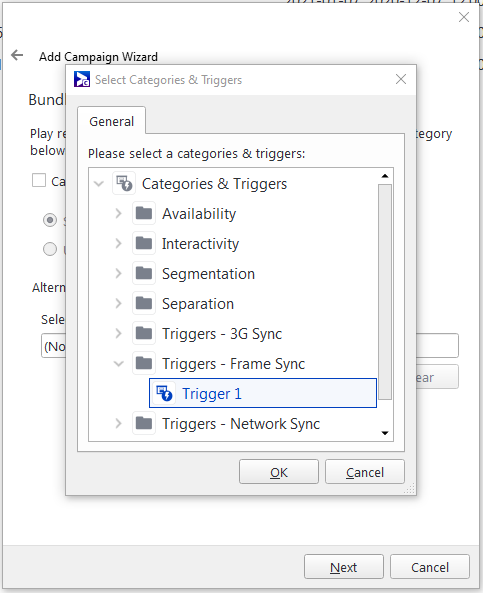
- Click the Select button and select the Frame Sync trigger category for both the Master and Slave campaigns (the trigger that you have created earlier):
Finished! You have configured frame synchronization on your network.


